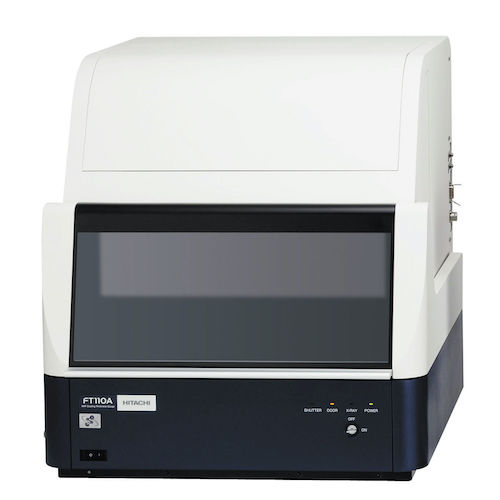
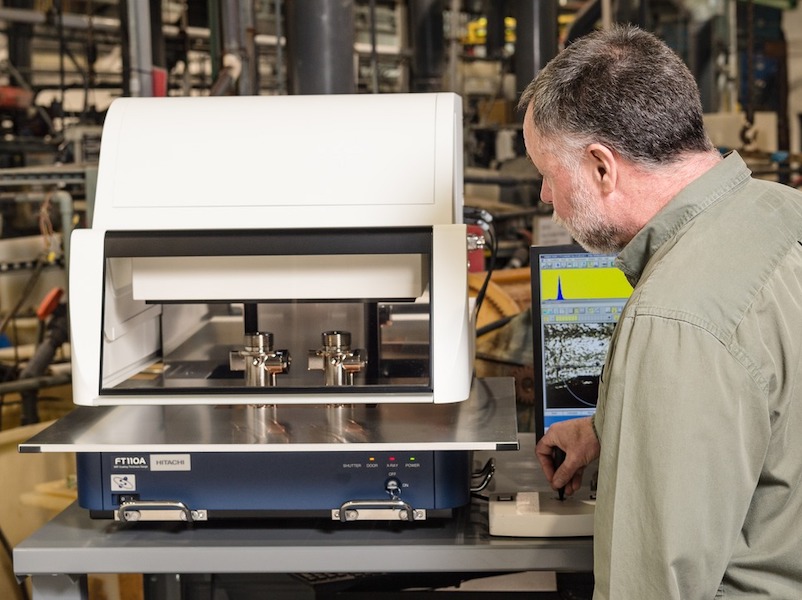
The FT110A is a benchtop XRF analyzer designed for the specific needs of the coatings industry. Like other benchtop analyzers by Hitachi High-Tech, the FT110A is easy to use, contains the latest X-ray fluorescence technology for high accuracy, and is rugged for 24/7 operation. On top of this, the FT110A has some specific features that make high volume coatings measurements much easier than basic analyzers.

Plating facilities do not always have the luxury of working with components of the same size. One day you may be plating small components, such as washers, the next you may have to deal with large, complex shapes like decorative fixtures. The FT110A makes this switch easy. The large sample table and measurement chamber can cope with samples up to 500 x 400 x 150mm in size and up to 10kg in weight. The analyzer quickly adjusts for tall parts, always maintaining the optimum distance between the measurement area and the analyzer’s analytical components. This even allows you to measure plating in recessed areas.
“The FT110A is a powerful and versatile XRF coatings analyser that tackles some of the most difficult challenges in coatings analysis, using clever features inspired by 40 years of experience in developing XRF coatings analysers," says Matt Kreiner, Product Business Development Manager for Coatings Analysis Products. "The advanced capabilities of the FT110A – including automated focusing, the wide-view camera and image processing software – reduce time spent setting up measurements, improve test program efficiency and ultimately help plating shops lower costs.”
In addition to the primary camera that shows a magnified view of the measurement area, the wide-angle camera lets you see the whole part. This double view helps you pin-point the feature you need to measure, making it simple to take several measurements over large, complex components or set up automated measurements of multiple samples.
The motorized sample stage is finely controlled with a joystick or software, and the automated sample focusing saves setup time, removing the need to manually focus each measurement. This means you can spend more time taking measurements and freeing you to perform other tasks.
Optimize Performance For Each Measurement
Using the right collimator for your component gives you the best accuracy and fast measurement times. Anticipating the need to switch between components of different sizes, the FT110A comes with dual 0.1 and 0.2mm collimators as standard. You have the option of choosing a quad collimator unit (adding 0.05mm and 0.025 x 0.4mm collimators) if you’re dealing with diverse components.
"You can choose the best collimator from a menu on the screen, making it easy to switch collimators as you need to," Kreiner says.
Easy To See When Parts Are Not To Spec
You can set up the FT110A’s software to present the results in the way that’s most meaningful to you. For example, you can give context to the results by viewing them against the upper and lower control limits (UCL / LCL) for your process. This is useful for spotting abnormal trends early.
Alternatively, you can view the raw XRF data on the screen. This is useful when you’ve identified a problem with a plated component, as you can use the spectrum view to check for impurities or mistakes in the plated surface or base material. It’s worth noting that you can also use the FT110A to analyze the composition of incoming goods, such as metal alloys to ensure you plate the right substrate.
To further help your root cause analysis of production problems, you can also check the composition of your plating bath using a simple sample cup that does not require any sample preparation.
Testing Of 4 Layers and The Substrate
Perhaps one of the most unique requirements of plated component measurement is that the part may have several different layers of different composition. The powerful X-ray components within the FT110A means that you can measure the composition and thickness of four plated layers and check the composition of the substrate. This is invaluable for finished goods analysis and can help you identify issues, even if they’re buried beneath the surface layer.
"The FT110A also meets the measurement method outlined in the standards ISO 3497, ASTM B568 and DIN 50987," Kreiner says. "And its ability to determine the thickness of coatings from titanium (22) to uranium (92), means it will continue to provide the accuracy you need when new, innovative coatings are developed in the future."
To find out more and to discover all the features of the FT110A and arrange a demo, get in touch HERE. You can see a complete technical overview of the FT110A benchtop analyzer here.


