
Filtration is the mechanical process to separate unwanted materials from the cleaner. The filtration unit is a medium through which only the cleaner can pass.
Through our experiences, many of us can attest to the beneficial link between effective filtration and quality metal-parts finishing. In other words, you’d be hard pressed to not see some form of filtration in a plating line.
Question: When walking the line backwards, how many cleaner tanks have you seen being filtered? Is it a good idea? What’s the real benefit?
 Stephen Rudy and Mike FrechetteIn a direct, continuous and expedient way, filtration removes fine particulates, metal shavings, oils and grease from the cleaner bath. Unlike the use of carbon for a plating bath in filtration, the medium of choice to remove the described contaminants in a cleaner consists of stainless steel, polypropylene, modified papers, organic and related hydrocarbon products.
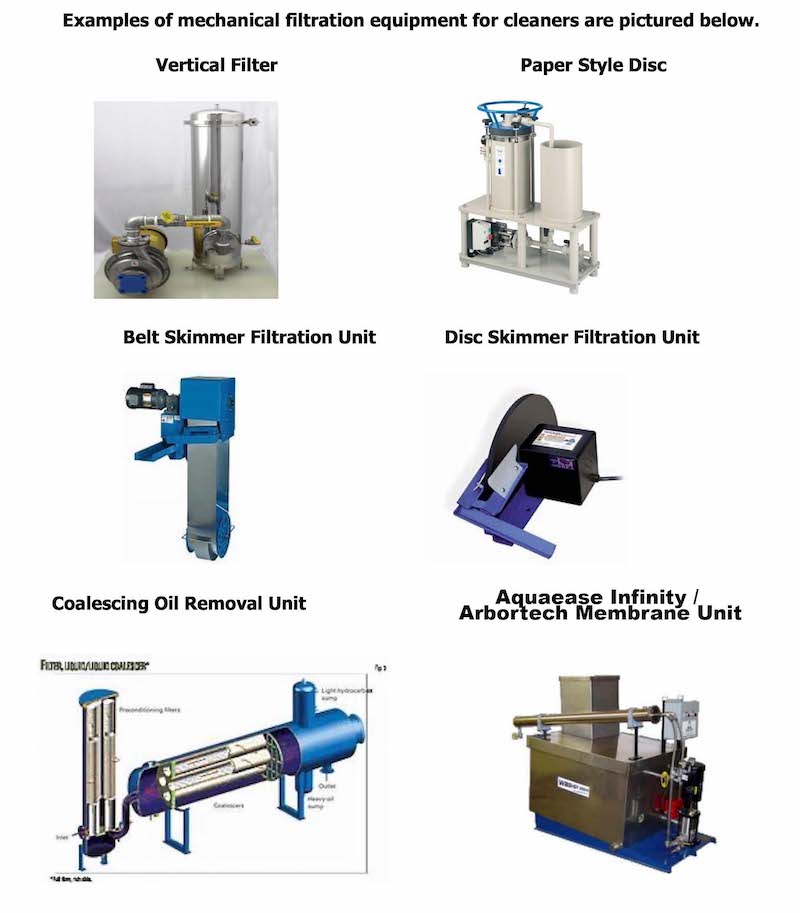
In filtering your cleaner, there are a variety of options:
- Membrane Filtration: This technology utilizes a permeable membrane system. The soiled cleaner is pumped through the membrane tubes. Molecules of sizes larger than the components of the cleaner, such as oil, coolant are blocked and diverted to a discharge. The aqueous cleaner passes through and returns to the process tank. Membrane filtration provides a rapid and very dramatic filtering action and can reclaim more than 98% of the cleaner. Membrane filtration is most suitable with soak / emulsifying cleaners.
- Cartridge Filters: These enclosed canister types have a polypropylene center around which similar fiber material is tightly wound. The porosity of the filter medium can range from 100 microns to below 5 microns, based on the specific filtering requirement. Particles are retained in the media pattern. The polypro material absorbs oily solutions. The cleaner is continually pumped through the filter cartridge. It is a relatively simple yet effective system to remove the typical contaminants found in the cleaner – and doesn’t take up much floor space. When spent, the supplier can often dispose of cartridges directly to a certified destruct facility.
- Oil Absorbing Filters: These units consist of an enclosed housing that contains polypropylene baskets containing special oil-absorbing plastic-type media. The cleaner is pumped through the enclosed system, where the media absorbs oils and grease. The saturated media is replaced as needed.
- Bag and Indexing Fabric Filters:The pros: The cleaner is pumped through a large filter chamber, where oil, grease and particles are retained. The cons: This filtration system is not suitable to systems cleaning large volumes of very oily parts, and it consumes a large amount of floor space.
- Coalescer:A coalescer channels the flow of the cleaner, separating the aqueous from oily solution.
- Belt and Disc Filters:These devices take up minimal space, plug into a 110 V outlet and operate automatically. The action is to efficiently remove displaced, floating oils. Either filter is typically installed in a side tank where the solution cools sufficiently to release oils, to be removed by either the belt or disc.
Removing oils, grease, shop dirt and metal fines serve to extend the practical service life of the cleaner as well as to maintain optimum hard surface cleaning of metal parts, preparing the surface for subsequent treatments.
Given Hubbard-Hall’s extensive experience using equipment and formulating specific cleaners, we know that filtering these baths is a solid decision. Let’s consider some available methods:
Determining Effective Service Life of the Cleaner
The ideal condition for any cleaner is the freshly prepared working solution, just before immersion of any parts. Following the first load of parts, the cleaner bath becomes soiled, as it should if it’s the right soak cleaner for the job.
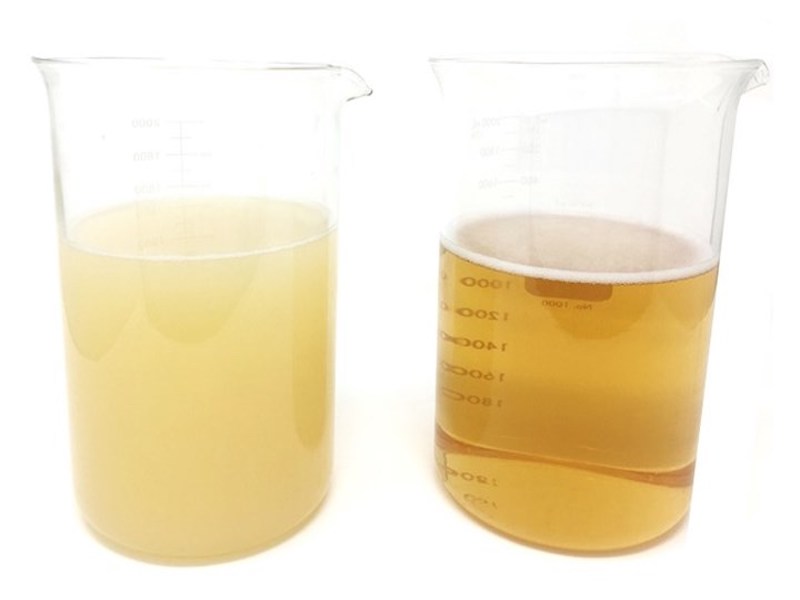
Production continues and – as it does – the bath steadily loads up with contaminants. These typically consist of oils, grease, shop dirt and fine particles. Telltale signs of the contaminated cleaner become more visible: the solution turns either a dark or tea brown-to-milky color; oils tend to separate and float (especially as the cleaner cools); grease rings form on the walls of the tank; and sludge and particles build up on the bottom of the tank.
The question becomes: How soiled does the cleaner have to get before it starts working against you? And when is it that maintenance additions of the cleaner do not improve cleaning performance?
Suppliers always provide a simple, effective analysis procedure to evaluate cleaner strength This is the quite popular titration or test kit procedure. (The majority of soak cleaners – over 90% — are of the alkaline type.)
The analysis is in effect a chemical neutralization, adding a standard acid to an indicator color change. Using a calculation per given product factor, the concentration of active product in the soak cleaner bath is determined. Appropriate additions of product concentrate are made, based on the analysis results, adjusting product concentration to a targeted value.
The problem is that over time, additions made in this manner gradually widen the gap between corrective and practical. The gap referred to is the worsening effect that contaminants exhibit, thus negating the intended practical cleaning improvements that product additions are intended to make. The point: There is really no such thing as a no-dump cleaner. All cleaners become exhausted at some point in their service life. This means that the titration analysis has a practical limit. That said, there are simple, quick and effective test procedures that can provide important cleaner bath data, complementing the titration or test kit procedure.
A couple of quick tests might alert you to potential trouble – and therefore help you avoid it entirely The focus of these tests not only give you a more quantitative analysis of the cleaner bath but can also help plan dump and new make-up to avoid interrupting the production schedule. More importantly, the goal is to eliminate finishing rejects due to poor hard surface cleaning.
- Specific Gravity: Measure the cleaner bath’s specific gravity when first made up (no parts yet immersed). On a regular schedule, measure and record the specific gravity as the bath ages while making sure to maintain the cleaner concentration at the initial make-up. There will be a point at which the data coincides with a drop in quality cleaning. The specific gravity will have increased to a point that indicates the amount of oil, grease, shop dirt and particles that have built up in the bath. Corrective action may include making additions of the cleaner concentrate, cutting the bath and replenishing, or dumping and replacing with a new make-up.
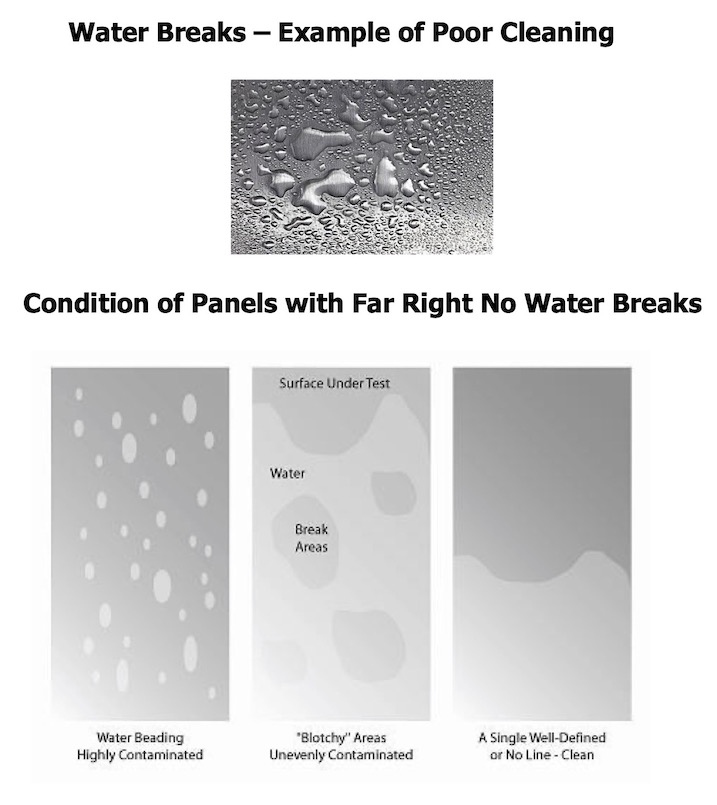
- Performance Test: Immerse a clean panel (for example, a steel hull cell panel) in the cleaner bath at the same temperature and amount of time as the parts. Rinse in cold running water for sixty seconds and examine for water breaks. Next, immerse in dilute acid (5% hydrochloric or sulfuric acid) for 15 seconds, followed by rinsing in cold running water. Examine for water breaks. A positive observation of water breaks at either step indicates deposition of soils from the cleaner bath onto the panel. Once again, corrective action may include making additions of the cleaner concentrate, cutting the bath and replenishing, or dumping and replacing with a new make-up. Tip: If adding 15-20% of the initial cleaner make-up does not eliminate the water breaks on re-test, dump the cleaner and replace with a new make-up.
- Oil Displacement: First conduct the described test on a sample of the newly prepared cleaner, never yet used. As the bath ages, the concentration of emulsified oily soils becomes more concentrated. Take a 90 milliliter sample of the hot cleaner and – slowly and carefully – add 10 milliliters of 10% sulfuric acid. Mix the solution well for about 15 minutes. Then, quickly and carefully pour the solution into a clean 100-milliliter graduate cylinder; adjust volume, if necessary, with a small volume of water to 100 milliliters. Observe as the oily soils separate. The direct read is the % of displaced oils before correction factor. Additionally, take note of any heavier sludges that may have settled out. These are also contaminants that may be a combination of mineral or chlorinated paraffinic oils (heavier than water) and other sludges. Compare the % displacements with results of the freshly prepared cleaner. Any % displacements for the new cleaner can be used as a correction factor when measuring % displacements in the aged soak cleaner. (Milliliters of displaced oils in aged soak cleaner) – (Milliliters of displacement reading in new cleaner) = Direct % of Displaced Oils in aged cleaner. It is important to conduct the oil splitting test on the new cleaner, as the acid reaction may split out a discernable volume of surfactants and wetting agents If there no split in the new cleaner, there is then no correction factor. Corrective action should be starting to sound familiar – making additions of the cleaner concentrate, cutting the bath and replenishing, or dumping and replacing with a new make-up. There are some instances where a build-up of metallic contaminants may result in smut formation on parts that should be cleaned. Or such metal contaminants may complex with the detergency complement of the cleaner, thus reducing the hard surface cleaning effectiveness. Metal finishing shops that have an Atomic Absorption Spectrophotometer (AA) can use the instrument to analyze for such critical metals that may result in the described problems:
Copper and Zinc, 300-500 ppm Iron: 800 -1,000 ppm
Control examples like these confirm or predict the point at which the cleaner – even with proper maintenance additions and at the correct operating temperature – will approach its maximum service life. In most instances, adding more cleaner concentrate will restore quality cleaning, but perhaps only for a short time, as these practical tests indicate.
Getting Tough on Contaminants
To this point, we have focused on removing the contaminants and continually minimizing their buildup. Many finishers take advantage of filtering cleaners and augment selected cleaner tests, as described. Consider the benefits that accrue – with cost savings interest – by filtering the cleaner and testing for practical service life.
- Extend cleaner bath service life: less downtime means longer periods of uninterrupted productivity.
- Fewer bath dumps: reducing the waste-treatment workload.
- Minimizing contaminants: helps to maintain solution consistency closer to new make-up.
- Quality cleaning: resulting in satisfactory surface preparation, which leads directly to quality finishing and post treatments.
Filtration Supplementation
Filtration can be supplemented by the application of mechanical oil-removal devices which are quite cost-effective and can be used in-tank.
- An overflow weir or side tank can collect cleaner solution (which cools down about 10°F-20°F below the temperature of the cleaner) while oils separate to the top. The oils can be skimmed off using a disk or belt.
A Final Consideration
Cleaning is the first step; it is in fact the most important step in a finishing cycle. But at the end of the day – every day – the filtering of cleaners offers metal finishers significant benefits across the board – improving quality, economy and productivity. By effectively filtering the cleaner and testing the chemistry in a practical way, buildup of contaminating soils is kept at a minimum and controlled. Subsequently, rinses and process tanks down the line are kept relatively free of contaminated cleaner solution drag in.
For questions on this information please call Hubbard-Hall at 1-800-648-3412 or techservice@hubbardhall.com