



A useful mass finishing trial is not simply a test that produces a better-looking part.
 Keith WongIt should answer a defined manufacturing question, expose risks such as media lodging and part-on-part damage, and leave behind a record that another operator can reproduce.
Mass finishing trials often begin with a deceptively simple request: remove this burr, improve this surface, or make this part brighter. The part is sent to a supplier, a promising sample comes back, and the process appears to work.
The trouble starts when you have to repeat the result in production. The sample may look acceptable, but nobody recorded the starting condition, the inspection method, the media condition, the batch arrangement, or the post-process handling. A media shape that reached the target surface may also lodge in a hole or slot. Parts that survived a small test batch may mark one another at production loading.
A better trial begins before the machine starts. It treats the test as a controlled engineering exercise with a clear question, an agreed acceptance standard, and a complete record.
1. Describe the Part, Not Just the Material
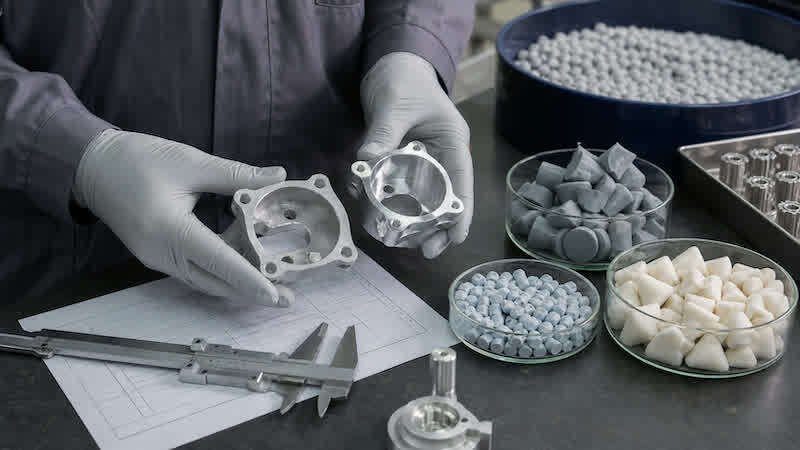 Part and media selection.Material is important, but it is only the first line of the trial brief. Two parts made from the same alloy can behave very differently because of their geometry, mass, prior processing, and sensitive features.
Record the full dimensions, weight, minimum section thickness, and the condition in which the part enters the finishing process. Identify holes, slots, recesses, blind features, threads, narrow gaps, sharp edges, and unsupported sections. Mark which surfaces may contact the media and which must be protected.
This description should distinguish functional surfaces from cosmetic ones. A face that looks visually minor may control sealing, fit, conductivity, or a downstream coating. Likewise, a burr on an external edge presents a different access problem from one hidden inside a cross-hole.
Photographs help, but a marked drawing is better. It gives the trial team a shared reference for burr locations, critical dimensions, protected surfaces, and areas where residual media could become trapped.
2. Turn “Better” Into an Acceptance Criterion
Words such as smooth, clean, polished, and deburred are open to interpretation. Before testing, define what change is required and how it will be judged.
For burr removal, identify the exact edge and the acceptable remaining condition. For edge radiusing, specify the location and the agreed inspection method. For surface improvement, state whether the objective concerns appearance, roughness, cleanliness, preparation for coating, or another functional requirement. If a dimension or thread must remain unaffected, include that in the acceptance criteria as well.
The inspection method should be agreed before the first trial. It may be a visual standard, a comparator sample, dimensional inspection, surface measurement, magnified examination, or a combination of methods. The important point is consistency. A result cannot be reproduced if the definition of success changes after the test.
Keep an untreated reference part and document the incoming condition. Without a baseline, it is difficult to tell whether variation came from the finishing process or from the parts themselves.
3. Screen Media Access and Lodging Risk Separately
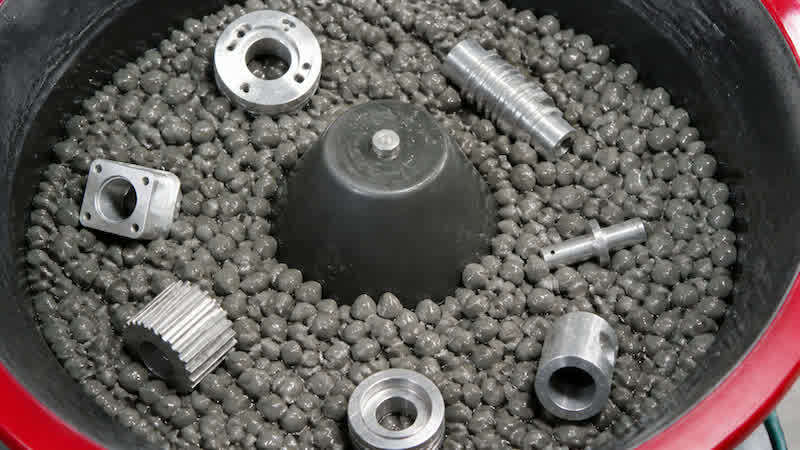 Mass finishing trial setup.Media must reach the target area, but access and safe release are not the same. A media shape may enter a feature effectively and still wedge, bridge, or remain hidden after processing.
Create a simple feature map for every opening or recess that presents a risk. Record its width, depth, transitions, intersections, and whether it is open or blind. Then compare candidate media by actual shape as well as nominal size. Also consider worn media because their dimensions and edges change during use.
Avoid relying on a universal media-to-feature ratio. Part geometries and media shapes vary too much for a single rule to replace a physical check. A safer screening sequence is:
- Check whether an individual media piece can enter the feature in more than one orientation.
- Check whether two or more pieces can bridge or lock together inside it.
- Consider how wear may change the fit over time.
- Confirm that the selected separation method removes free media after the cycle.
- Inspect the finished part specifically for retained media, including blind and intersecting features.
The aim is not always to keep media out. Some internal surfaces need contact. The trial must find a combination that reaches the required area without creating an unacceptable retention risk.
If the geometry cannot be made safe with the proposed media, the correct response may be to change media shape, change process route, mask or fixture the feature, or use another finishing method. Producing a visually good sample does not justify accepting an uncontrolled lodging hazard.
4. Evaluate Part-On-Part Contact
The second physical risk is damage caused by parts contacting one another. Thin edges, finished faces, long components, and cosmetic surfaces may be marked even when the media itself is suitable.
Start with a deliberately controlled loading condition and examine likely contact points. If the parts cannot tolerate unrestricted contact, evaluate dividers, separate compartments, individual fixtures, or another process arrangement. Record the number and orientation of parts in the trial. “One good sample” does not demonstrate that a loose production batch will behave the same way.
Contact risk also affects unloading. Parts can be damaged during discharge, separation, rinsing, transfer, or drying, so the review should cover the full handling path, not just the time inside the finishing machine.
5. Record the Complete Process Setup
A trial record should allow a competent operator to understand what was done without relying on memory. At minimum, record:
- the machine type, model or test-unit identification, and relevant configuration;
- the media material, product identity, shape, nominal size, and condition;
- the compound identity and the wet or dry operating condition;
- the number and total weight of parts tested;
- the loading arrangement and any divider or fixture used;
- the cycle time and each inspection interval;
- the discharge and separation method;
- the rinse, cleaning, transfer, and drying steps; and
- the inspection method and result for each acceptance criterion.
Photograph the starting parts, the setup, and the finished parts under consistent lighting. Where appearance matters, keep camera position and exposure as consistent as practical. Otherwise, photographic differences can be mistaken for process differences.
Machine settings and process quantities should be reported as trial conditions, not as universal recommendations. The useful question is whether the documented combination met the agreed criteria on the representative parts provided.
6. Use Staged Inspections and Controlled Changes
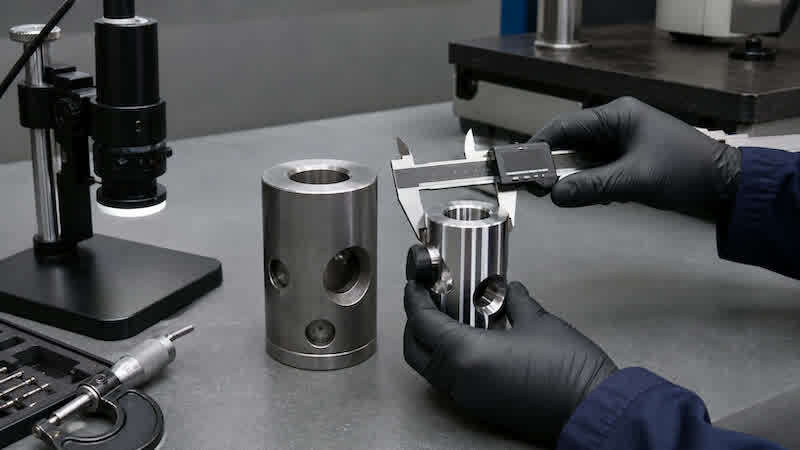 Post trial inspection.Inspecting only at the end of a long cycle hides useful information. Intermediate checks show when the target condition was first achieved and when unwanted effects began.
Plan inspection points that suit the part and the expected process window. At each point, evaluate the same locations by the same method. If the finish improves early but critical edges or surfaces begin to deteriorate later, the trial has identified a boundary that an end-point-only test would miss.
Change one main variable at a time whenever practical. If you change media, compound, loading, and cycle time together, the result may improve, but the reason remains unclear. Controlled changes slow the trial at the start but make it more valuable when you need to transfer or adjust the process.
Record unsuccessful conditions too. They prevent repeated mistakes and help explain why you selected the final setup.
7. Test Separation and Post-Process Inspection
The trial is not complete when the machine stops. Confirm that parts and media can be separated reliably and that the inspection method can detect any retained media.
Pay particular attention to holes, intersecting passages, threads, recessed pockets, and features that are difficult to see. Depending on the part, inspection may require controlled orientation, airflow, magnification, a probe, weight comparison, or another validated method. The appropriate method is part-specific and should be agreed with the manufacturer.
Also check whether compound residue, moisture, or loose debris remains after rinsing and drying. A clean-looking external surface does not prove that internal features are clear.
If production will use automated separation, the trial should eventually represent that system. Manual removal during a laboratory test may conceal a problem that returns at production scale.
A one-page trial record: A concise record can be organized under five headings:
| Section | Information to capture |
| Part | Material; dimensions; weight; incoming condition; drawing revision; critical and protected features |
| Objective | Target surfaces; required change; measurable acceptance criteria; inspection method |
| Risk screen | Media access; lodging and bridging risks; part-on-part contact; separation concerns |
| Process | Machine and configuration; media and condition; compound; batch; loading; cycle; handling steps |
| Results | Inspection at each interval; photographs; retained-media check; rejected conditions; final decision |
The final decision should be explicit. The trial may support further validation, require another controlled test, or show that the proposed route is unsuitable. Each outcome is useful when supported by evidence.
What a Successful Sample Does Not Prove
A laboratory trial can demonstrate that a documented condition worked on the samples tested. By itself, it does not establish production throughput, long-term media behavior, equipment capacity, cost per part, or process capability across normal incoming variation.
Those questions require representative quantities, an agreed operating window, and validation under conditions that reflect production handling and inspection. Media wear, part variation, water condition, compound control, operator practice, and separation performance can all affect the result over time.
The purpose of the first trial is therefore not to promise a universal recipe. It is to reduce uncertainty and produce a defensible basis for the next decision.
Conclusion
The most useful mass finishing trial is not necessarily the one that produces the brightest sample. It is the one that clearly defines the manufacturing problem, tests the important risks, records the full setup, and produces a result that can be checked and repeated.
When you address part geometry, acceptance criteria, media loading, contact risk, separation, and inspection together, the trial becomes more than a demonstration. It becomes a practical engineering record for deciding whether and how the process should move toward production.