


In the automobile and motorcycle industries, appearance sells.
 Donald BauerThe most obvious attraction of a vehicle is the number of chrome accessories that adorn its exterior. This paper will cover design engineering, materials, auxiliary anodes, maintenance, and selecting a supplier.
The proper design and maintenance of plating racks is “the right start to a perfect finish”.
Note: This paper was originally published in 2003.
Introduction
Racking in its crudest form can consist of little more than a piece of wire twisted onto the part to be finished. This method is obviously the cheapest and, just as obvious, the most inefficient. Along with inefficiency, you cannot ensure a quality finish because of how the part presents to the anodes. For decorative automotive finishes, custom racks are necessary. In this discussion, we will review rack design and maintenance for decorative automotive applications.
Engineering
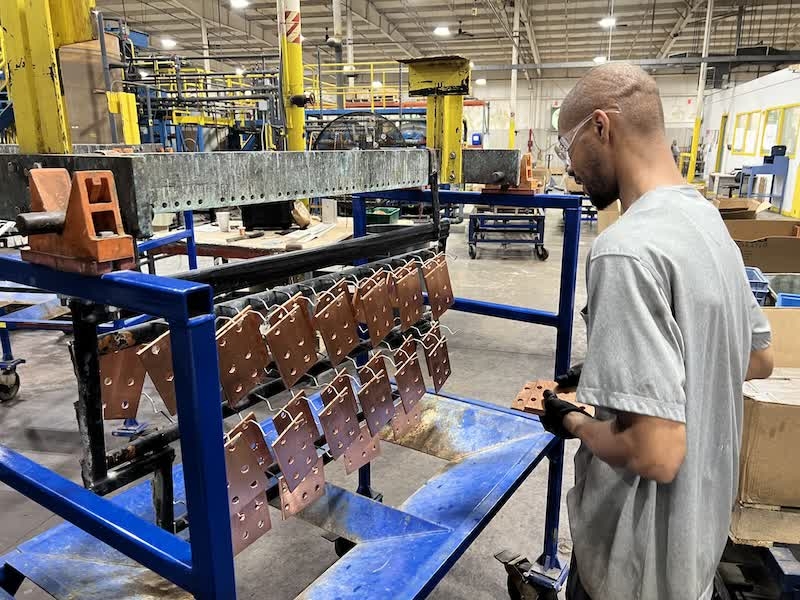 The most important feature of any rack is the design. Without proper design, you cannot expect to achieve the optimum productivity your process is capable of. Many factors come into play when designing and building racks for decorative automotive applications. The following items will be discussed.
- Equipment manufacturers
- Dimensional restrictions
- Weight restrictions
- Part presentation and spacing
- Rack material
- Manufacturing techniques
- Auxiliary anodes, robbers, shields
- Optimized design
- Ergonomics
- Maintenance
- Selecting a supplier equipment manufacturer
Several automatic equipment manufacturers are on the market, and each has its own methods for attaching or mounting a rack. Manual lines also use simple carrier bars where the rack hangs on the flight bar.
The two most common lines manufactured are the return line and hoist line. Regardless of the equipment, the first consideration is how the rack will hang on the cathode bar.
Some manufacturers of return type equipment use brass alloy castings to carry the current to the rack. Most of these castings differ, and to ensure a perfect fit, you need the center-to-center dimension where the rack hangs on the casting. If a rack does not hang properly on the casting, you cannot ensure the required current flow and risk the rack not having the appropriate clearance as it moves from station to station.
Hoist lines typically use copper flight bars, which can vary in length, and carry the racks from station to station. The bars are commonly rectangular but can be round. A hoist line's advantage is that racks can have varying center-to-center locations and overall widths, allowing several racks to be loaded onto a flight bar.
Dimensional Restrictions
The primary dimensional restrictions are the overall height, part placement, width, and depth of the rack.
Height considerations must take into account the distance from the top of the cathode bar to; the tank with the lowest solution level, the distance to the bottom of your tanks, and the distance from the top of the cathode bar with the hoist in the raised position to the top of any obstructions on the top of the tanks such as the exhaust duct. For example, if the distance from the top of the cathode bar to the plating bath is 12” and the depth of the plating solution is 48”, in theory, the overall height would be 60”. Because there can always be unseen obstructions in the bottom of the tanks such as airlines, dropped parts, or sludge, you will never want to have a rack too close to the bottom. Staying at least 2” off the bottom is normally sufficient, so the overall height would be 58”. Now, to locate the first part, we have already determined the distance from the top of the cathode to the solution level is 12”. If the top portion of the parts to be plated were at this 12” mark, there would be no room for error if the solution level fluctuated due to drag-out or evaporation. Therefore, the part should be at least 2” below the solution level.
When measuring the cathode-to-solution-level dimension, you must consider the tank with the lowest operating range. For instance, if your plating solution was at the lowest level and the rinse was at the highest, and you measured the rinse tank, the top row of parts may not be adequately plated because they would protrude out of the plating solution.
Shadowed parts can result from parts being too close together or overlapping one another. It can also be caused by improper shields, which will be discussed later.
The cathode bar working area and tank dimensions restrict the overall rack width. Whether the cathode bar is a casting or copper bar, the overall width is usually determined by the tank. Typically, most tanks have bussing, air lines, or heat exchanger piping entering the tank from one or both sides. For large copper carrier bars, it is common to have several racks on a bar rather than one large rack unless the part necessitates it. To clarify, if the working area of the carrier bar were 12 feet, you probably wouldn't want a 12-foot rack because it would be too hard to handle. Instead, three 4-foot-wide racks would be much easier to work with.
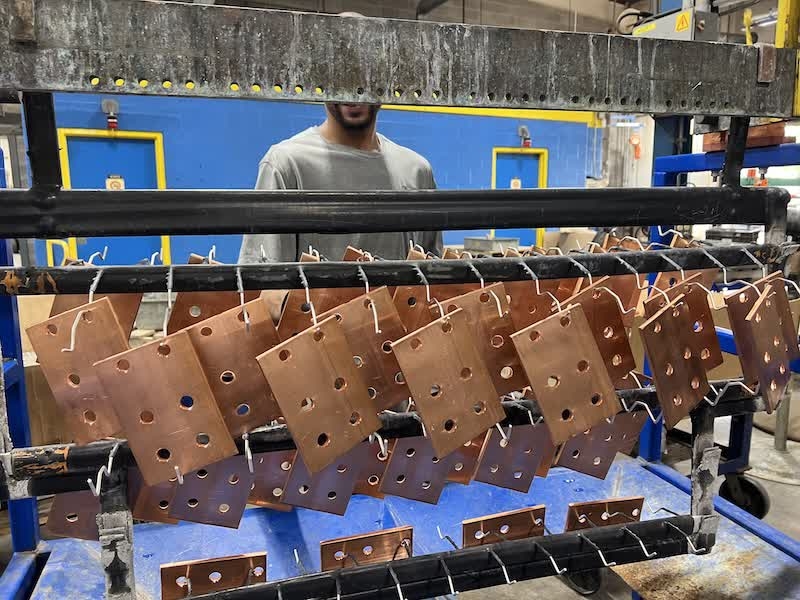
For uniform plating, parts on the rack should be equidistant between the anodes because the plating rate varies with distance from the anode. The distance between the anodes is required to ensure parts are properly positioned on the rack. For example, if the distance between the anodes were 30”, you would not want the part racked off center by 6” either way. That would put the part 9” from one anode and 21” from the other. You would end up with non-uniform thickness from one side to the other. However, there are occasions when you may want to place a part closer to the anode to improve uniformity of deposit due to part configuration. To accomplish this, you can utilize an auxiliary anode, which will be discussed later.
Weight Restrictions
All hoist systems are designed and restricted to lift a specific weight. Most importantly, the shop employees have a more critical weight restriction. The first thing a customer tells a rack supplier is to put as many parts on the rack as will fit. Most plants have Safety and Health Engineers who have set lifting restrictions. For any rack handled offline, the rack designer needs to know the weight limits. As an example, if the request is to build a rack for parts that weigh 8 ounces, and you have a work area that will hold 96 parts, the loaded rack will weigh 48 pounds. This is probably too much weight, and the remedy would be to build two racks. However, if the rack is loaded and unloaded on the plating machine and the hoist has the lifting capacity, the weight would not be an issue. If weight is an issue, the rack designer will need to know.
Part Presentation and Spacing
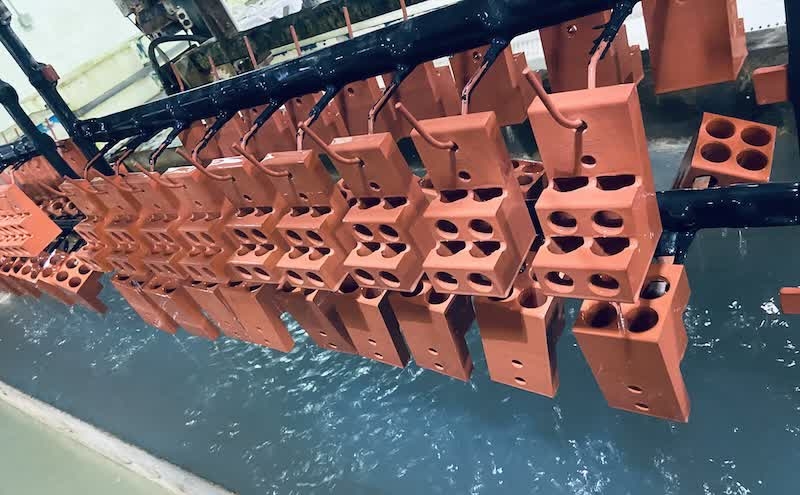 The decorative nickel/chrome plating process relies on proper part positioning, particularly during chrome application. Nickel has better throwing properties and can reach recesses and corners. Still, to ensure proper coverage, it is important to allow the parts as much exposure to the anodes as possible. The rack designer’s objective is to position parts so one part does not shadow another or sit too close to another.
Most platers who provide decorative nickel/chrome finishes know that the cosmetic appeal of their product is what sells. Parts that are shadowed, burned on the ends, have grown whiskers, or have a rough finish are a sure way to end up with rework and eventually an ex-customer. It is the rack supplier’s responsibility to eliminate potential problems when designing a rack.
Shadowed parts can result from parts being too close together or overlapping one another. It can also be caused by improper shields, which will be discussed later. Burned and whiskered parts can result from mounting a part too close to the anode or not accounting for high-current areas on the part. Sometimes this problem can be resolved by mounting the parts on the rack so the high-current areas are close together; thus, both pieces share the current path. If mounting the parts this way does not work, then alternative devices such as robbers and shaders must be used. We will discuss these later.
One of the more difficult surface blemishes to eliminate is roughness or shelving.
Shelving results from particulate contamination in the nickel bath that settles on the part during plating. You can sometimes eliminate this by racking the part so there are no flat areas in the horizontal plane, such as racking it vertically. However, due to the configuration of some parts, this may not be possible. You can make one surface vertical and end up with another horizontal. The plater may need to increase the bath filtration rate or check the filter, as a problem may be preventing it from functioning properly.
No miracle formulas exist for proper part spacing, because most parts are in odd configurations and aren't always round or square. Most rack suppliers have a feel for appropriate spacing based upon experience. There are, however, some general rule-of-thumb guidelines. It has been said that you should not place parts next to one another any closer than the depth of the part. It is also said that chrome will throw into a hole or cupped area no greater than the diameter. Of course, if your solutions are not maintained to optimum concentrations and minimum contamination, these “rules of thumb” will not hold.
Rack Material
Copper is the predominant material used to build racks for the decorative automotive nickel/chrome plating industry. To carry the necessary current throughout the rack and distribute it to the parts, nothing is as conductive as copper, except silver. Anyone want to have a rack made of silver? Some rack suppliers have been known to use steel in an effort to “price down” their product to win the job. This should be avoided at all costs. Steel carries only 12% of the current of copper at the same size. For example, to carry 125 amps in a single spline rack, you would need a 1/4”x1/2” piece of copper. To carry the same current in steel, the material would be 1”x1”. Using a less conductive metal means that you will need more voltage to get the required amperage. This means that your rectifier will have to work harder, increasing your utilities and decreasing your rectifier life. Steel can be used throughout the rack for bracing and additional support. When comparing two suppliers quoting the same rack, find out what the rack frame material is made of.
Aluminum has been used successfully, even though it carries only 60% of the current compared to the same size in copper. Normally, when weight is an issue, aluminum is used to reduce overall weight. This is recommended only as a last resort.
Stainless steel is the preferred tip material throughout the industry. Both alloys 304 and 316 are used. Better suppliers use 316 because it is a better product, even though it costs more. Stainless steel offers adequate current-carrying capacity in most cases and resists most nickel strippers used when the racks are cleaned. In some cases, copper and phosphorus bronze are used to carry current to the part, especially when the part is large and stainless steel cannot supply enough current.
Racks do have a life expectancy. Over time, wear can cause tips to break, plastisol to break down, or your machine to crash, turning your once-square rack into a pretzel.
In these cases, you cannot subject the tip material to aggressive acidic rack strip solutions. To protect the rack’s metal framework from the plating-line chemistry and to insulate the rack from plating up, your supplier needs to coat the rack in a good plastisol.
However, not all plastisols are created equal. Some rack suppliers cut corners by using bottom shelf plastisol. This isn't noticeable on delivery and can look as good as higher-priced competitors’ racks. The problem develops later and becomes noticeable when you compare plastisol life. Premature plastisol degradation creates cracks in the coating, allowing solutions to carry from tank to tank and contaminate plating baths. It can also cause acids to reach the copper framework and eat away at the metal. Coating failure and a damaged framework will cost more in the end because you'll need early rack repairs and replacement of corroded framework. You should not buy your racks based upon cosmetics alone, because a lot can be hidden under the plastisol. Be sure your supplier uses good-quality materials, from the metals to the plastisol.
Manufacturing Techniques
One difference between a good supplier and an adequate supplier is construction quality.
The preferred method for constructing the rack frame is to bolt the framework pieces together. Sometimes the customer requests that the framework be soldered at the joints. This improves joint integrity by fusing the two pieces, but it raises the question of whether it improves conductivity. Rigidity can be accomplished by bracing.
Tips can be bolted or riveted in place on the rack. Either method works fine for smaller tips. Larger tips will require bolts. Regardless of method of attachment, the tips need to be mounted directly to the surface of the copper. Each tip needs to be mounted directly. Some rack makers will weld three or more tips to a steel bar. They then bolt the bar onto the copper frame, making contact in only two places and forcing the current to flow through the steel before it reaches the tip. This shortcut creates resistance where the steel is bolted and will not allow the proper current flow to the parts.
Racks do have a life expectancy. Over time, wear can cause tips to break, plastisol to break down, or your machine to crash, turning your once-square rack into a pretzel.
When you return your rack to your rack supplier, you should expect more than repairs. On a rack that has been used so much that some tips have broken from stress, you should expect your supplier to return it to you as good as new. This does not mean that only the broken tips are replaced. A good supplier will replace all of the existing tips with new ones, turning a repair into a rebuild. Yes, this normally costs a little more, but what good is it to replace a few tips only to have a few more break within a month after you get the rack back? The first tips broke due to stress. The rest of the tips are also stressed. You should never have only the broken tips replaced.
Be sure to date all your racks so you know when they were manufactured. This will help you track the longevity. Beware of suppliers who are afraid to tell you when the rack was made.
Auxiliary Anodes, Robbers, and Shields
 Plating inside recessed areas, such as wheels and step bumpers, is difficult and sometimes impossible without an auxiliary anode. The auxiliary anode brings the anodic source closer to the part surface, allowing the current to reach recessed areas. Under normal plating conditions, the tank anode can be anywhere from 12” to 16” from the part. For those recesses that cannot be plated, the application of an auxiliary anode can place the anodic source fractions of an inch from the recesses. The determination is at times easy to make and at others not so easy. Experience and process knowledge are usually enough to make the decision. Other times, you decide to use an auxiliary anode because the part won't plate correctly. Auxiliary anodes should be made removable to facilitate loading and unloading as well as adjustable. Adjustments are necessary to bring the anode closer or farther from the part to get the proper coverage. The auxiliary anodes can be secured to the rack using insulated, plastisol-coated material so the anode does not cross the current path with the rack. Normally, the auxiliary anode has an extended tail near the rack hooks, and a jumper cable can then be attached between it and the tank’s anode bar or bussing.
The jumper can also be attached to a separate rectifier. For nickel/chrome processes, it is best to use an auxiliary anode made of titanium that has been platinum plated or titanium with a platinum-clad niobium mesh attached. The platinum is normally plated at a thickness of 150 microinches and depletes around 0.5 microinches per cycle under normal processing.
When designing spring tips, consider a few tricks to make loading and unloading easier. Try to minimize the size of the material used for the tips. This will make it easier to squeeze the tips. Smaller material will also carry less current, so you must be careful not to jeopardize the finish.
Robbers are used to prevent burning in high current areas of the part being plated.
Robbers also go by other names, such as thieves or burning bars. Sometimes, parts with sharp edges or points need special care. Current flow to these areas is typically excessive, and the parts tend to burn. Sometimes you can place parts on the rack so their edges are close together. In this case, the parts act as robbers to each other, minimizing high-current areas. If this cannot be accomplished, then robbers will need to be built into the rack to rob current from the part. Robbers are normally made of stainless steel so they can be stripped as they build up with plating. They are built into the cathodic frame of the rack. Some platers have tabs at each end of the rack and make cathodic contact. The tabs are trimmed free of plastisol in a small area, and a wire is connected at each spot. The wire is now a cathode. The wire will be placed so the sharp or pointed end of the part is very near. Once the plating cycle starts, the wire begins to plate like the part itself. The robber will divert some current away from the part's high-current areas and reduce or eliminate the chance of burning.
One of the simplest ways to improve coverage in low-current areas and reduce the chance of burning in high-current areas is to place a shield, or shader, between the anodes and the piece being plated. Unlike the anode, which attracts current, a shield diverts it. A shield can be a piece of nonconductive material placed over the high-current area, forcing the current to take a longer path around the shield to reach the part surface. This directs the current into low-current areas, possibly reducing the need for auxiliary anodes.
Optimized Design
We in the rack business would like to sell you as many racks as we can. It is our business, and the more we sell, the more we profit. However, customer satisfaction will always ensure another purchase order, and it’s our job to help you save money when we can. You do not need a rack designed for each part. If you have a variety of parts to be plated, tell your supplier that you would like to optimize the racks where possible. Start by gathering all the parts to be plated.
Identify how each part will be racked and mark each location. Separate the parts into groups with similar racking points. You should then be able to more easily design tips that will hold different parts on the same rack.
Ergonomics
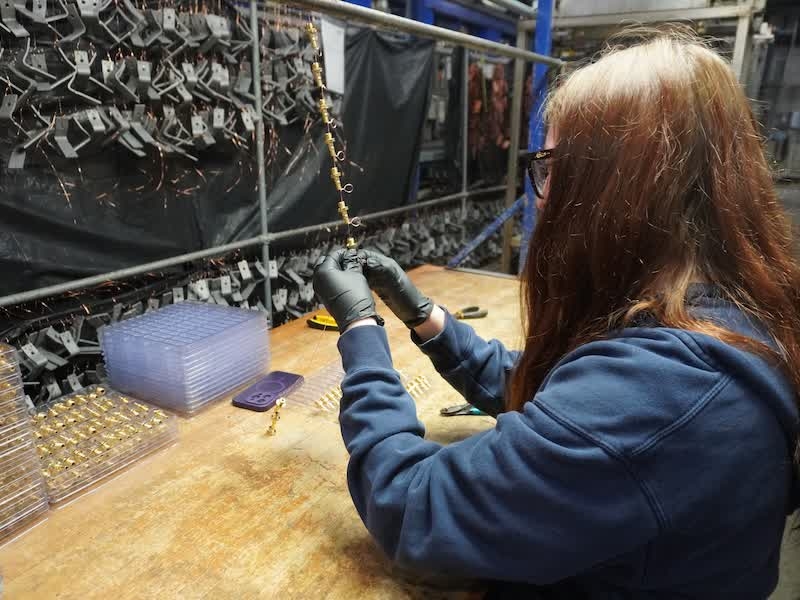 As mentioned earlier, rack design must consider the human element.
People get tired. People wear out. Beyond lifting restrictions, other ergonomic concerns include injury from repetitive motion. Workers’ compensation claims for repetitive motion injuries can be kept to a minimum if the design accounts for the demands of racking and unracking. When a worker has to squeeze tips to load and unload parts all day long, this constant motion may contribute to repetitive injuries. Because gravity tips or simple hooks are risky for automotive decorative chrome, spring tips are a good alternative for securing the part and maintaining positive contact.
When designing spring tips, consider a few tricks to make loading and unloading easier. Try to minimize the size of the material used for the tips. This will make it easier to squeeze the tips. Smaller material will also carry less current, so you must be careful not to jeopardize the finish. The tips could also be designed so the part can be loaded without squeezing by hand. The parts can be located on one tip end, then pulled into alignment with the other tip end, allowing the part to be racked without unnecessary hand movements.
Sometimes you cannot design an ergonomically friendly rack for a variety of reasons. The best way to avoid worker injury is to rotate job assignments so one person is not always doing the same job.
Maintenance
Let’s assume that your supplier has done their job and you have taken possession of your wonderful new racks. It is now up to you to maintain them. Regular stripping of the tips is essential for decorative automotive plating. Some people use acidic strip tanks that work just fine if chemically maintained and racks are not left in the stripper for too long. The acid is highly concentrated. It will aggressively attack the tips and the copper frame if the plastisol breaks. There are proprietary strippers on the market that are much more forgiving. Regardless of the chemistry, stripping should be done regularly to prevent nodules from building up on the tips. Excessive plating on the tips can cause shading and act as robbers, diverting the current from the part. The best thing you can do for your rack supplier is use a hammer and pliers to clean excess plating off your tips. We really like to walk into a plating shop and see people hammering tips and using pliers to twist and flex tips to release the plating.
The racks you purchased were not cheap, and they are not indestructible against misuse and abuse. They will probably need rebuilding over time, but you can take precautions to prevent premature spending. Before setting your next rack budget, set aside enough funds for your supplier to provide a storage method. Organized storage helps manage production time by keeping all your racks in a specific location, eliminating unnecessary search-and-rescue from that huge pile or the racks in the corner.
Selecting a Supplier
When selecting a supplier, the cheapest may not be the most cost-effective in the end. In most cases, you get what you pay for. Look for a company that has a history of successful performance. This company and its sales force should know the plating industry well. You will know this from the company’s active involvement in industry-related trade organization meetings and their personal knowledge of your plant and your processes. A machine or metal fabrication shop can bend and bolt copper, but they do not know metal finishing. They would be of no help in designing or providing input that only an established designer and manufacturer of plating racks can contribute. Just remember, the right rack is “the right start to a perfect finish”
Donald Bauer spent more than 40 years in the metal processing industry, where he gained extensive experience in various types of finishing, including anodizing, electroplating, and paint, with a strong track record in process engineering, process planning, lab management, and labor management. He is now a Lead Nadcap Auditor for the Performance Review Institute.